
Have you ever dreamt of bringing your ideas to life? Imagine sketching a quirky gadget or a masterpiece figurine, and then, holding that very creation in your hands. 3D printing design makes this fantasy a reality. It’s like having a miniaturized factory on your desktop, churning out tangible objects from your digital blueprints. But before you unleash your inner inventor, there’s a crucial step: understanding the design principles for 3D printing.
What is 3D Printing Design?
Think of 3D printing design as the bridge between your creative spark and the physical object. It involves using specialized software to create a digital 3D model, essentially a set of instructions that tells the 3D printer how to build your design layer by layer. Just like writing a recipe for a delicious cake, your 3D model dictates the shape, size, and structure of your final product.
Here’s a cool analogy: Imagine building a brick wall. Each brick represents a layer in your 3D model, and the complete wall represents the final printed object. By carefully arranging these “digital bricks,” you can create anything from a simple keychain to a complex mechanical part.

3D Printing Design Software Available
Now that you understand the concept, it’s time to equip yourself with the tools! There’s a wide variety of 3D design software available, catering to different skill levels and project needs. Here’s a breakdown of some popular options:
- Beginner-Friendly: These programs offer intuitive interfaces and pre-made templates, perfect for those new to 3D design. Think of them as user-friendly kitchens with pre-measured ingredients. Examples include Tinkercad (great for kids!), Tinkercad https://www.tinkercad.com/, and SketchUp Free (excellent for basic modeling).
- Intermediate: As you gain confidence, these programs offer more control over your designs. Imagine them as well-equipped kitchens with a wider range of tools and ingredients. Popular choices include Blender (open-source and powerful), Blender https://www.blender.org/download/, and Fusion 360 (great for mechanical design).
- Advanced: For seasoned designers and engineers, these programs provide maximum flexibility and advanced features. Think of them as professional kitchens with high-end equipment. Some industry-standard options include Solidworks, SolidWorks https://www.solidworks.com/ and CATIA, CATIA https://www.3ds.com/products/catia.
The best software for you depends on your experience, project goals, and budget. Don’t hesitate to explore different options and find the one that suits your style!
How to Design a 3D Printing Model
Now comes the exciting part: creating your very own 3D model! Here’s a roadmap to guide you through the process:
- Concept & Planning: Every great invention starts with an idea. Sketch your design on paper or use mind-mapping tools to visualize your creation. Consider the object’s purpose, size, and functionality. This initial planning stage is like laying out the recipe for your 3D masterpiece.
- Modeling Software: Open your chosen 3D design software and dive in! Most programs offer basic shapes like cubes, spheres, and cylinders that you can manipulate and combine to build your model. Imagine these shapes as your building blocks.
- Modeling Techniques: There are two primary approaches to creating 3D models:
- Solid Modeling: This method creates a solid object within the software, perfect for functional parts and everyday items. Think of sculpting a clay model.
- Mesh Modeling: This technique builds the object from a network of triangles, ideal for organic shapes and complex geometries. Imagine creating a mosaic artwork.
- Adding Details: Breathe life into your model with details! Use the software’s tools to create holes, textures, and engravings. This step is like adding frosting and sprinkles to your 3D cake.
- 3D Printing Considerations: Remember, you’re designing for the 3D printer, not just for aesthetics. Keep in mind factors like:
- Wall Thickness: The walls of your model need to be thick enough for the printer to build them properly. Too thin, and they might collapse during printing. Imagine the structural integrity of your cake layers.
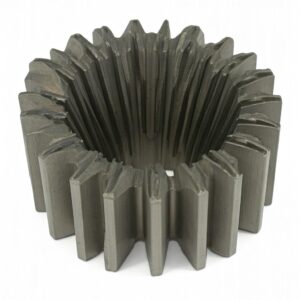
- Overhangs: Parts that jut out without support below them can cause printing issues. Design support structures or adjust your model to avoid overhangs. Think of building scaffolding for your 3D creation.
- Watertightness: For objects meant to hold liquids, ensure your model is completely sealed with no gaps. Imagine a leaky cake – not ideal!
- Exporting the Model: Once your masterpiece is complete, it’s time to export it into a format that your 3D printer understands. Common file types for 3D printing include STL (.stl) and OBJ (.obj). These formats essentially translate your digital creation into a set of instructions for the printer.
- Slicing & Printing: The final step before hitting print is slicing. Imagine slicing a cake into thin layers. Slicing software takes your 3D model and cuts it into thin horizontal layers, which the printer will build one on top of the other. These settings can be adjusted based on your printer and desired print quality.
Pro Tip: Many 3D design software programs have built-in slicing functionalities, making the process seamless.
Remember: Don’t be afraid to experiment! The beauty of 3D printing design is the ability to iterate and refine your model before hitting print. Utilize online tutorials, 3D printing communities, and online design repositories (like Thingiverse [thingiverse ON Thingiverse thingiverse.com]) for inspiration and troubleshooting.


Common Problems with 3D Printing Models
The road to 3D printing success isn’t always smooth. Here are some common problems you might encounter, along with solutions:
- Warping: This occurs when the printed model curls or bends due to uneven cooling. Use a heated bed or adjust printing temperatures to minimize warping. Imagine a cake warping in the oven – similar principle!
- Stringing: Those pesky thin strands of filament that appear between non-printing movements. Adjust retraction settings in your slicing software to combat stringing. Think of unwanted spiderwebs on your freshly baked creation.
- Support Removal Struggles: While support structures are crucial for overhangs, removing them can be tricky. Use breakaway supports or delicate tools to avoid damaging your model. Imagine carefully removing the scaffolding from your 3D masterpiece.
- Poor Print Quality: This could be caused by various factors like incorrect nozzle temperature, underextrusion (not enough filament), or overextrusion (too much filament). Calibrate your printer and experiment with settings to achieve optimal print quality. Think of achieving the perfect consistency in your cake batter for a smooth finish.
Remember: Troubleshooting is part of the learning process. Don’t get discouraged by initial hiccups. With practice and online resources, you’ll become a 3D printing pro in no time!
Optimizing 3D Printing Models
Now that you know how to navigate the design process and troubleshoot common issues, let’s explore techniques to optimize your 3D prints for success:
- Wall Thickness Optimization: Use software tools to analyze and adjust your model’s wall thickness for structural integrity without wasting filament. Remember, the walls need to be strong enough to hold their shape, but not overly thick to minimize printing time and material usage.
- Minimize Overhangs: While some overhangs are inevitable, try to design your model with minimal unsupported areas. Consider redesigning elements or using support structures strategically to prevent printing issues. Think of designing bridges or arches in your 3D creation with proper support.
- Mesh Simplification: For complex models with a high polygon count, consider mesh simplification techniques. This reduces the number of polygons while maintaining the overall shape, leading to faster slicing times and potentially smoother prints. Imagine simplifying a complex cake decoration into a simpler, yet recognizable design.
- Orientation & Placement: The orientation of your model on the print bed significantly impacts printing time and material usage. Experiment with different orientations to find the most efficient layout. Additionally, consider printing multiple smaller objects simultaneously to maximize printing efficiency. Imagine arranging cupcakes on a baking sheet for optimal space utilization.
By implementing these optimization techniques, you’ll not only achieve cleaner prints but also save time and filament – a win-win situation!
Stay tuned for the next section, where we’ll delve into Frequently Asked Questions (FAQs) about 3D printing design, equipping you with even more knowledge for your 3D printing adventures!

FAQs
Table 1: Frequently Asked Questions (FAQs) about 3D Printing Design (Continued)
| Question | Answer |
|---|---|
| What are some limitations of 3D printing design? (Continued) | Print size limitations (depending on the printer) – Complexity limitations (very intricate designs might be challenging) |
| How much does 3D printing design software cost? | There’s a range of options! Some beginner-friendly software is free, while intermediate and advanced programs might have subscription fees or one-time purchase costs. Do your research to find a program that suits your needs and budget. |
| What are some resources to learn more about 3D printing design? | Online tutorials and courses (YouTube YouTube: https://www.youtube.com/, Skillshare [skillshare ON skillshare.com]) – 3D printing communities and forums – Online design repositories (Thingiverse [thingiverse ON Thingiverse thingiverse.com]) – Books and ebooks on 3D printing design |
| Is 3D printing design difficult to learn? | The difficulty curve depends on your chosen software and desired skill level. Beginner-friendly programs offer a gentle introduction, while advanced software requires a steeper learning curve. With dedication and the abundance of online resources available, anyone can grasp the fundamentals of 3D printing design! |
| What are some career opportunities in 3D printing design? | 3D modeling artist – Product designer – Prototype engineer – Medical 3D printing specialist |
| The future of 3D printing design sounds exciting! What can we expect? | The future is bright for 3D printing design! Advancements in materials science will open doors to printing with even stronger, more flexible, and biocompatible materials. Additionally, we can expect more user-friendly software and potentially even home 3D printers with advanced capabilities. 3D printing design has the potential to revolutionize various industries, from manufacturing and healthcare to fashion and architecture. |